Monday, June 24, 2019

Dehydrated Red Lentil Curry Soup for Backpacking


I've been making Red Lentil Curry Soup for several years now.  It is a recipe I've adapted from several recipes and now is a family favorite. 

I've spent the last week dehydrating food for our upcoming backpacking trip this July.  I definitely want good tasting and nutritious food on this trip.  Dehydrating it myself is the best way to make this happen, and save a lot of money. 

I've changed the recipe a little bit for dehydrating, switching the diced tomatoes for tomato paste.  You can cook the soup on the stove, or in an Instant Pot.  Then work hard to keep yourself from eating it right then, and spread it on dehydrator trays with fruit leather liners.

Red Lentil Curry Soup
By Barbara Spencer Frohne

Ingredients:
1 Large onion, chopped
2 cloves garlic, minced
1 TBSP fresh ginger, minced or pressed through a garlic press
2 - 6 oz cans tomato paste
1 - 2 tsp curry powder or garam masala, depending on spice level preference
1/2 tsp red pepper flakes
4 cups low sodium vegetable broth
2 cups water
1 can of coconut milk
1.5 cups of dry red lentils
2 grated carrots (optional)
2 - 3 hand fulls or more of chopped kale or spinach (Optional)
chopped fresh cilantro (optional)
Salt to taste

Stove top directions:
Place all the ingredients, except the kale or spinach and cilantro, into a soup pot. On the stove, bring to a boil and then cover and simmer on low heat for 20-30 minutes, until the lentils are very tender. Stir in the chopped kale or spinach, and cilantro and salt. Continue to simmer with the lid on until the greens are wilted. Remove from heat, and salt to taste.

Instant Pot directions:
Place all the ingredients, except the kale or spinach and cilantro, into the liner of your instant pot. Put on the lid. Press manual and high pressure for 8 minutes. When finished, allow it to natural release for 20 minutes, then release then carefully release the rest of the pressure. Open the lid and stir in the chopped kale or spinach, and cilantro and salt. Put the lid back on, and let it set for a few minutes. Come back and stir in a couple minutes. When they are wilted, the soup is ready. Salt to taste.

Dehydrator directions:
If you want to make your own dried soup, place scoops of the soup on your fruit letter trays, and spread.  


Then dehydrate at 135 degrees until completely dry 10 - 12 hours.


3/4 way through the drying time, use a thin pancake turner to flip the soup over, so that the underside can dry also.  


When the soup feels completely dry, crumble it into a large bowl.  (Realize this will stain your fruit leather trays, because of the tomato products in the soup.)


Place the dehydrated soup into small zipper bags.  Keep in the freezer to keep it fresh until you are ready to take it out on the trail.  One batch of soup makes 4 - 1 cup baggies of dehydrated soup.  I like the Great Value Square Snack Bags from Walmart.  They are light and a very convenient size. 
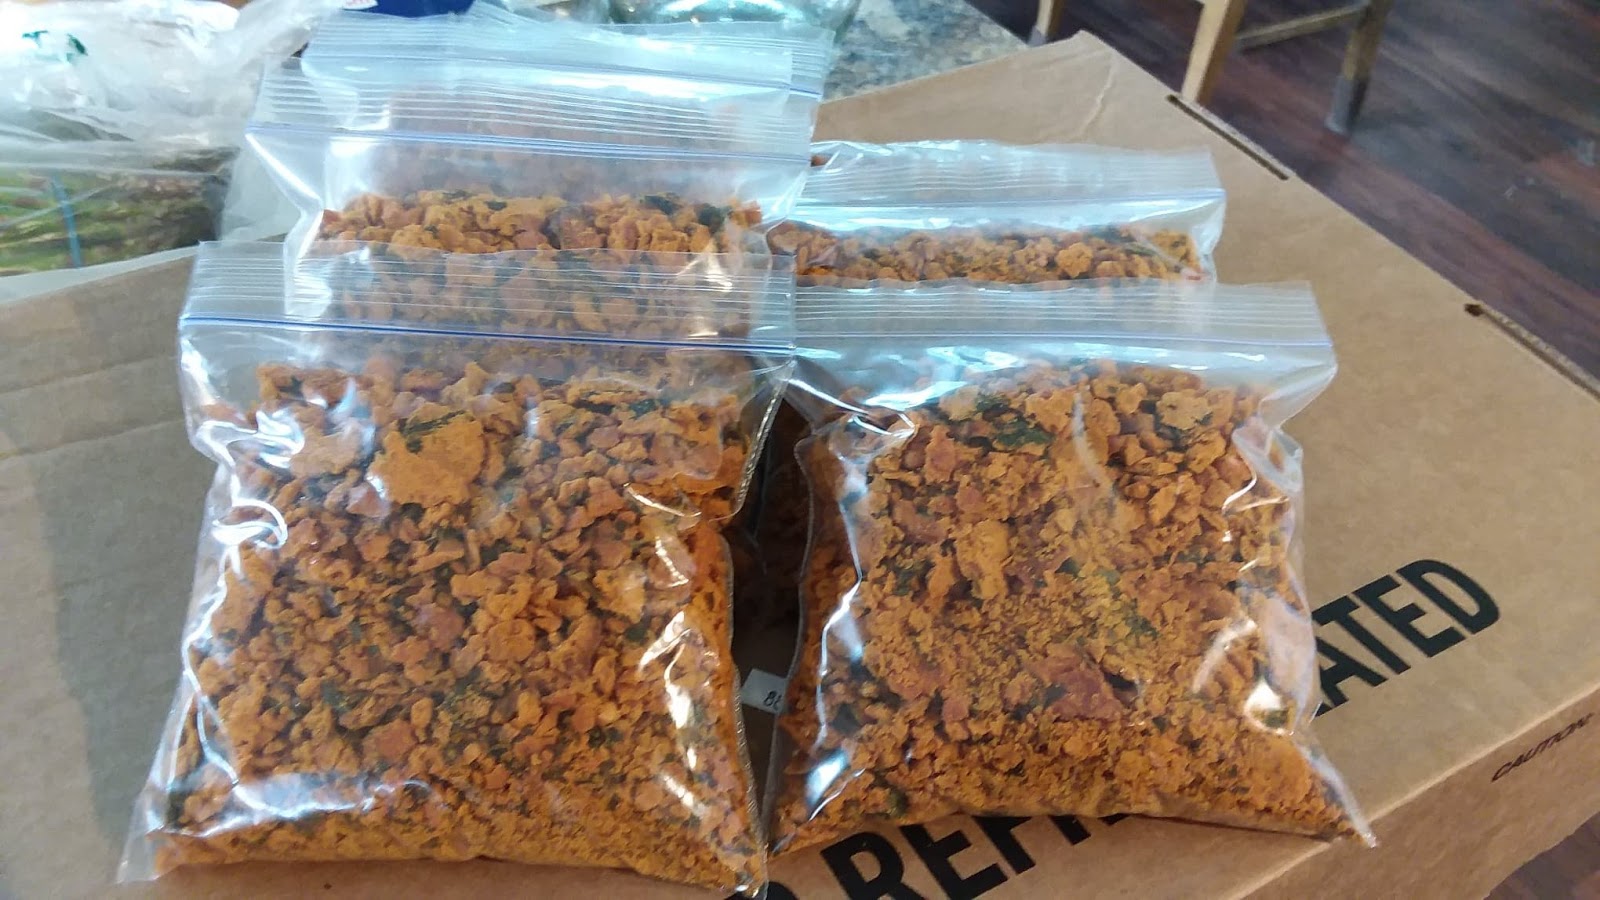


To re-hydrate your soup in your kitchen, or out on the trail.  Add 1/2 cup of the dry soup mix and 1 cup of boiling water to a cup.  In 2 - 4 minutes, it will be ready to eat.


 The longer it sits, the creamier it will become. 


Sunday, July 17, 2016

Summer Days Blackberry Banana Cobbler


Summer Days Blackberry Banana Cobbler
Gluten-free, Vegan
Barbara Frohne


2 TBSP oil
1 – 1.5 cups sugar, Sucanant, or Florida Crystals, (If your berries are sweet you can use less)
2 cups gluten-free flour mix, or Sorghum flour*
2 tsp baking powder
1.5 cups non-dairy milk
2 - 3 medium, ripe mashed bananas
Around 3 - 4 cups of blackberries**
1 cup walnuts, chopped

Preheat oven to 350*

1. Spread the oil in the bottom of a 9x13 baking dish.

2. In a mixing bowl, combine the sugar, flour and baking powder. Mix well. Add mashed bananas, and non-dairy milk, then mix until smooth. Pour this batter over the oil in the baking dish, but do not stir.

3. Arrange the blackberries over the batter. They can be lined up side by side, but don't put on a double layer. Then sprinkle the top with the walnuts.

4. Bake in pre-heated oven, for 30 minutes.


* I don't like the texture of straight brown rice flour. You may substitute whole wheat pastry flour if you don't have gluten-free concerns.

**You may substitute other berries, blueberries or raspberries.

Tuesday, October 21, 2014

Barbara's Pumpkin Muffins - Gluten-free, Vegan, Delicious, with an oil-free variation

I've  been working on my Pumpkin Muffin Recipe this fall, and have come up with an improved recipe, with an oil-free alternative.  I think you will really like it.  I will post it here, and put a link to it on the original Pumpkin Muffin Recipe page.


BARBARA'S PUMPKIN MUFFINS
Gluten-free, Vegan, Delicious, with an oil-free variation
By Barbara Frohne
www.wildflowermorningrecipes.blogspot.com

WET INGREDIENTS:
3/4 cup water or dairy free milk
one 15 oz can pumpkin
1/3 cup oil OR 6 dried prunes soaked in the water until they are softened
1/3 cup honey

DRY INGREDIENTS:
1/4 cup garbanzo flour
1/4 cup tapioca starch
3/4 cup white or brown rice flour
3/4 cup sorghum flour or oat flour
1/3 cup flaxseed meal (grind whole flax seeds in a blender or coffee grinder)
1 tsp baking soda
1 tsp baking powder
1/4 tsp salt
1 tsp cinnamon
1/2 cup raisins
1/3 cup chopped walnuts or pecans (optional)

Preheat your oven to 350 degrees.

Prepare your muffin pan by spraying pan spray into each cup, or using muffin papers.

Puree the wet ingredients in a blender until smooth and creamy. In a large bowl, combine the dry ingredients and mix together completely. Add the wet ingredients from the blender to the flour mixture in the large bowl and blend with a large spoon until everything is just mixed together, no longer. Spoon into a greased muffin pan or muffin paper. Mound the dough up to the top of the muffin cup.

Oil Free alternative: Soak 6 dried prunes in the 3/4 cup water until they are softened. Blend until smooth. Puree with the other wet ingredients. Substitute the prune puree in place of the oil in the wet ingredents.

Bake at 350 F (175 C) for 30 minutes.

Makes 12 muffins.

The link to the old recipe is here.

Thursday, June 26, 2014

Barbara's Bountiful Blessings Bread

 I have been needing to put this recipe on the web for quite a long while, but I have been holding off, because I didn't have photographs to share too.  I decided that because my friend needs the recipe today, that I will put it up without the photos, hoping that someday I will manage to not be in such a hurry to eat the bread and remember to get out the camera.

I am pretty sure that if you like a hearty, healthy bread, that you will like this satisfying loaf.

Barbara's Bountiful Blessings Bread
http://wildflowermorningrecipes.blogspot.com/
Gluten-free and Vegan
Makes 2 loaves

By Barbara Frohne

(With directions suitable for living in a dry climate.  If you live in a warm humid place the steam will likely not be needed.)

Step 1:  Mix the following into a small bowl and set aside for at least 15 minutes.
1/2 cup flax seeds
1/4 cup chia seeds
1 1/3 cup warm water

Step 2:  Measure and mix the following ingredients into a large bowl.
1/3 cup ground flax seed
1/3 cup ground chia seed
1/4 cup psylium seed husks,
1/4 teaspoon vitamin C powder
2 cups tapioca flour
2 cups millet flour
2 cups sorghum flour
2 teaspoons salt
1/4 cup sugar
8 teaspoons active dry yeast

Step 3:  Put a teakettle on the burner and bring it to a boil.  Set it so it won't whistle, but steam will pour out of the spout instead. 

Step 4:  Add the following to the very large bowl, and mix very well for a minute or two with a wooden spoon.  If it is too stiff for the spoon, knead with your hand in the bowl or on the counter, but it doesn't need much more flour.  You want to keep it light.
1/2 cup light cooking oil (I use grapeseed oil)
3 cups warm water
The pre-soaked seed mixture from step 1

Step 5:    Place a dish of water on the bottom shelf of the oven to provide humididy in the oven.  Preheat the oven to 390 degrees.  

Step 6:  You should have a sticky dough now.  Spray two loaf pans.   Sprinkle some rice flour or sorghum flour on the counter.   Divide your dough in two pieces.  Place one piece at a time on the counter and shape into a loaf shape.  Place into the loaf pans.  The dough is sticky and will stick to your hands, but do the best you can to manage it, keeping it as light and tender as possible. 

Step 7:  Set the loaf pans on top of the stove with the steam from the teapot aimed at them.  Let them rise for 15 – 20 minutes.  Make sure the oven is pre-heating. 

Step 8: Bake at 390 degrees for 45 - 50 minutes, or until the loaves are browned and loaves sound hollow.  (You might need longer. I think I did last time, but can't remember how many minutes I added.  It might have been more then 1 hour all together.)

Step 9:  Remove from oven and loaf pans and cool.  And try to resist the temptation to eat it all right now.

Tuesday, May 6, 2014

Stuffed Yams with White Beans and Kale - The New Breakfast


We are making some changes in what we eat.  We attended a seminar by Dr. Linda Carney this weekend.  We learned some important things that seemed timely in our health journey.  My husband is searching for ways to reverse atherosclerosis.  We learned that leafy greens dilate blood vessels, and heal endothelial cells.  Endothelial cells are the lining for the blood vessels.  That is where the plaque builds up.  Oil and most other fats damage endothelial cells, yes, even olive oil.  But walnuts and flax seed don't harm the lining of the blood vessels.  They contain the essential fatty acids, Omega 3's that are important all through the body. 

Dr. Carney recommends that everyone eat greens, beans and squash or yams for breakfast.  Yes, I know that is a big switch in ideas about what makes a healthy breakfast, but for us, it was worth a try.  "Breakfast like a king," you know.  We are setting out on a month long journey to see what happens to our health if we eat this way.

For lunch eat more beans, and greens, and other veggies.  You can end with fruit if you would like a little sweetness to make the pleasure center of your brain happy.

For supper eat whole grains and fruit.  Oatmeal or oat groats are a good choice.  Brown rice is also a good choice for those who can't eat oats. 

Yesterday we started by eating yams, salad greens and freshly cooked garbonzo beans.  I found out that the garbonzo beans balanced out the super sweet taste of the yams.  I haven't like yams that much before, because they are so sweet, but it may be that I haven't eaten them with beans before.  I was surprised that I liked them plain, and they didn't even need salt. 

Yesterday I searched out some new recipes and found a couple that we are going to try this week.  I think that all the recipes will need tweaked, to get rid of oil or vinegar or other unnecessary, or even harmful ingredients.  As I adapt recipes I will be posting them here.  I hope they will be helpful in your search for good health also.

I cooked some Great Northern Beans in the crock pot overnight, so they were ready when I got up this morning around 6:30.   I rinsed the yams I bought yesterday, placed then a baking sheet, at 400 degrees.  While they were baking I had some quite time for Bible study and prayer.  About 7:40 my daughter got the asparagus ready, and I fixed the kale.  Breakfast was on the table at 8 am.  It wasn't as hard as thought it would be to do this.  It just takes a little thought and advance preparation.

After breakfast I heard these comments.

"This tasted much better then I thought it would."

"I didn't think I would like yams this way, but I now like it better then any other way I've eaten yams."

"This was really filling."

"I feel satisfied." 

"We are going to have to make this again."

And so we will. 


Stuffed Yams with White Beans and Kale
www.awildflowermorning.blogspot.com

4 medium sized yams
1/2 cup chopped onion
2 cloves of garlic, minced
1-2 bunches of kale, washed and chopped
1/4 - 1/2 tsp dried Italian herbs
1/4 tsp dried mild pepper flakes
3 cups of cooked Great Northern Beans, or other white beans
1/2 tsp salt

Wash the yams, and place on a baking sheet in a 400 degree oven.  Bake 45 minutes to 1 hour.

When the yams are about finished, placed the onions and garlic in a dry skillet on medium heat.  Stir often so they do not stick.  If they start to stick, you can sprinkle water on them.  When they are beginning to soften add the damp kale.  If it is dry, sprinkle some more water on them.  Stir.  Then put on a lid to help them steam.  When they start to change the color of green add the Italian herbs, pepper flakes and salt.  Stir.  Add the beans, and gently stir, just enough to mix them in the green.  Heat until they are warm.  Be careful not to mash the beans. 

Place a yam on a plate.  Cut it almost in half, lengthwise, like it was a baked potato.  Squish it open just a little, and spoon in some of the kale and bean mixture.  Place some spears of asparagus on the side.  Do the same to the remaining 3 yams.  Serve with a happy heart. 


Monday, January 20, 2014

Garbonzo Rice Stew


I'm trying to use the food that I have on hand, and not run to the store to buy something new all the time.  I am trying not to let anything spoil in the fridge before it is used.


I cooked a crock pot full of garbonzo beans on Friday, and there were still quite a few left over today, sitting in the refrigerator waiting to be  eaten.  I decided that we needed some kind of soup, and that garbonzos were going to be the main ingredient.  I looked around on the internet to get a few ideas, and then came up with my own recipe, based on the ingredients I had on hand, and suggestions from my kids.

We did the photo shoot before we ate.  While eating, the kids and I agreed that this soup needed something else.  We added some brown rice, left-over in the refrigerator, and now we think the soup is perfect.  But you will have to guess what it looks like with rice added.


Garbonzo Rice Stew

1 onion, diced
3 carrots, diced,
3 garlic, minced
1Tbsp olive oil
1/2 tsp red pepper flakes
1/2 tsp cumin, ground
1/2 tsp Italian herbs
1/8 tsp tumeric
2 Tbsp LaChicky vegan/gluten-free/soy free Chicken style seasoning (or other chicken style seasoning)
1 bunch of kale, chopped
8 cups water
1 tsp salt (or less, depeding on the saltiness of  your beans and your chicken-style seasoning)
6 cups pre-cooked garbonzo beans, also known as chickpeas.  (If you use canned beans, you will need to decrease the salt in the recipe.)
4 cups cooked brown rice

Saute the onions, carrots and garlic in the olive oil until soft.  Add the red pepper flakes, cumin, Italian herbs, tumeric, LaChicky seasoning, chopped kale, water and salt.  Stir.  Add the garbonzos.  Scoop out 2 - 4 cups of the soup, and blend until smooth in a blender.  Place back into the soup pot.  Add the brown rice.  Bring to a boil.  Serve with bread, or crackers and mashed avocado on the side for a delicious lunch.

Friday, January 17, 2014

Chickpea Flatbread - Gluten-free, Vegan

Oh my!  Oh my!  I just made the most fabulous gluten-free, vegan, flat bread I've ever made.  It is a little bit like foccacia, and a little bit like pizza.  Preparation was easy, and the kids are begging me to make it again for supper, so I know it is a good one.  It is made from chickpea flour, something that is a staple in many gluten-free kitchens already.


From my reading on the web, it appears that chickpea flat breads were first made in Italy, and then spread to south France, and now are common in South America too where many Europeans immigrated.  I am certain that my version is not authentic, but it is tasty, and nutritious, fitting the needs of my American family.  Your family might like it too.

I include 1/2 an onion in each recipe.  In my opinion, that is what makes this bread fabulous.  But I know other people would disagree with me.  I am pretty certain you could leave it out, as many recipes have no onions or other veggies in them.  But since I eat a plant based diet, I add veggies to any dish possible. Who knows, maybe next time I'll add some kale.

It doesn't taste a bit like chickpeas or beans when it is baked.  If you have people in the family who might think they don't like chickpeas, call it by it's Genovese name, Farinata, instead.

By the way, you may want to consider making a double or a triple batch, because the bread disappears quickly. 


Chickpea Flatbread - Gluten-free Vegan
www.wildflowermorningrecipes.blogspot.com

1 1/4 cups chickpea flour, also called garbonzo flour or besan
1 1/2 cups water
1/2 tsp salt
1 - 2 Tbsp extra-virgin olive oil
1/2 medium onion, chopped small
1/2 can of black olives, sliced

1.   Mix together the chickpea flour, salt and water.   Leave it to rest for 30 minutes or more.

2.  Preheat the oven to 425 degrees Fahrenheit. 

3. Chop the onions finely, and slice the olives.  

4.  Pour the olive oil in the bottom of a cast iron skillet (12 inches round), or other oven proof pan, such as a pizza stone, or even a casserole dish.  Wipe a little of the oil up the sides of the pan about 1/2 inch.  Evenly distribute the onions in the pan, and then sprinkle the olives on top of the onions.  

5.  When the batter has sat long enough, evenly pour it over the onions and olives, careful to cover the bottom of the pan to equal depths of batter.

6.  Place the pan in the hot oven,and let bake for around 25 minutes, or until firm and starting to get a little crispy.  Let the flatbread cool before cutting and handling.


Monday, December 30, 2013

Dried Winter Squash


 My friend brought me a giant squash picked from her garden in the fall.  We enjoy eating squash, but it was more then we could eat before it went bad.  What do you do with extra fresh cut squash?  My friend had the perfect solution, you dry it.  You peel the squash, and then slice it thinly, hopefully with an electric food slicer, or food processor, and then you spread it on dehydrator sheets and dry it. It took around 24 hours for it to dry at 115 degrees in my dehydrator.  One have of that giant squash made 1 gallon of dried, squash chips.  I actually enjoy eating them just like that.  But I am really looking forward to to putting a handful in each pot of vegetable soup I make, without having to peel and cut a squash first. 

And then next fall I'll know what to do with winter squash from my garden.


Tuesday, November 26, 2013

Pineapple Pomegranate Oatmeal

I made something new for breakfast this morning.  Since my 14 year old son gave it "high compliments," (Direct quote), I thought some of you might be interested too.  I call it Pineapple Pomegranate Oatmeal


Pineapple Pomegranate Oatmeal

Cook enough oatmeal for your family or follow these instructions for a family of four.


Place the following ingredients in a saucepan and cover with a lid:

3 cups of water
1/2 cup raisins

Bring the water to a boil on high. 
Add 2 cups of old fashioned rolled oats (gluten-free if needed)

Stir.  Put the lid back on.  Then turn the heat down to low.  Let it set there for around 10 minutes. 

Take off the heat.  Put in a pretty dish.  Stir in:
- some pineapple tidbits, or fresh chopped pineapple,
- some walnut pieces
- pomegranate seeds

Serve with a gratitude, a smile and a non-dairy milk of choice.

Note:  There is an easy way to get pomegranate seeds out of that funny red ball without a huge mess.  This short video tells you how.  It's our method of choice now.

Thursday, February 7, 2013

Foreign Vegetable Supper


I am writing about our time on the island of Guam on my other blog.  Usually I write about food only on this blog, but this supper seemed that it might  be of interest to my main blog readers.  If you'd like to find out what kind of foreign vegetables we ate for supper, head over to my other blog for a look.


Sunday, January 20, 2013

Sorghum Rice Loaf - Gluten-free, Not Vegan, Bread


 I am on the island of Guam for the next three months.  Before we came, I wondered how we were going to live, and eat gluten-free.  Would we only have rice available?  The good news is that there are many gluten-free food available on Guam.  They aren't always cheap, but Payless Grocery Store at the Micronesia Mall has a large health food section, and many gluten free items.  A month before we came, I placed an order with Azure Standard and had it shipped to the island.  It arrived in excellent condition just about the time we arrived.  So I have gluten-free oats, sorghum flour, and brown rice flour to bake with.  I found flax seed on island.  My mom mailed me a tiny amount of Xantham gum, so I might use that sometime.

I googled some bread recipes to see what I could bake with what I have available.  I tweaked my first experiment, and came up with this recipe.  I am compromising on my vegan ideals, and using eggs whites in the recipe so we have a good rise and texture.  At home I often use Udi's bread, which also has eggs, so I decided that might help my bread too.  It does make a difference.  Though I think I still prefer my more complicated bread that is on this blog, Barbara's Almost Whole Wheat, Gluten-free Bread, it has more ingredients then I have here.

We took this bread with us on a camp out this weekend at the beach, and enjoyed it with peanut butter for one breakfast, dipped in mashed bananas and soymilk and fried as french toast for the second breakfast, and as the buns for homemade burgers one night.  Out of the four loaves I made last week, there is only one loaf left.  I guess I will have to make some more this week.


Sorghum, Rice Loaf -Gluten-free, not Vegan, Bread
Makes 2 medium Loaves

Step 1:  Mix the following ingredients in a large mixing bowl.
2  cups of brown rice flour
2 cups sorghum flour
2 cups tapioca starch
1.5 teaspoons salt
8 teaspoons yeast
4 Tablespoons psylium seed husks (I used Metamucial with the shortest ingredient list, including only psylium seed husks, citric acid, and   . )
1 Tablespoon sugar

Step 2:  Blend in a blender, then add to the dry mixture
1/2 cup flax seed
1 cup warm water

Step 3:  Combine and add to the dry mixture
3 cups very warm, but not hot water
4 egg whites
1 Tablespoon oil

Step 4:  Mix together the dry and wet ingredients until completely mixed, then mix by hand for 2 - 3 more minutes.

Step 5:  Divide the dough, and spread into two, medium sized loaf pans.  Spray them if they are not tefflon.  Let the loaves rise for 30 minutes.

Step 6:  Preheat the oven to 375 degrees F.  Place the loaves into the oven and bake for 45 minutes.  Remove from the pans and cool.


Thursday, December 13, 2012

50 Carrot Cake - Vegan and Gluten-free

Last week I baked five different cake experiments, in hopes of finding the perfect carrot cake recipe for my parent's 50th wedding anniversary.  Mom requested carrot cake, so carrot cake it will be.  But you know, I'm not the greatest cake baker.  Even back when I ate wheat and and all things dairy, I didn't really do cake much.  I'd rather eat pie, or something smooth and creamy.   But Mom and Dad have been married 50 years.  That's notable.  They deserve a delicious, beautiful cake in honor of all their committed years together.

My first experiment was one recipe divided in half.  One used eggs. (I know, not vegan, but I had to know if they were necessary).  One containted egg replacer.  The egg cake was fluffier, but it fell apart as I was taking it out of the pan.  The egg replacer cake held together, and it wasn't too dense, at least for a carrot cake.  The cake tasted good, but was too moist, turning kind of wet by the next day.  Cake three was just "ok".  But nothing else.  Cake four turned nice, (thank you for sharing the recipe LaTeaDa) if you are looking for a cake with a full dose of sugar, oil and spice.  Mom and I thought it might make make a nice breakfast cake. But we were looking for something a little more mild, and it had to contain pineapple  So experiment 5 took place.  I used some ideas from cake two, and some of cake 4 along with some of my own ideas, and came out with what I considered to be a "perfect" vegan, gluten-free carrot cake.  I took some of the last two sample cakes to a potluck, and all of the mature ladies thought cake five was the best. 

Would you the recipe?  I'll add photos after the party.


50 Carrot Cake - Vegan and Gluten-free
www.wildflowermorningrecipes.blogspot.com

Step 1:  Preheat oven to 350 degrees.  Spray two 8" cake pans, and then dust with flour, then set aside.

Step 2:  Chunky ingredients.
Get the following ingredients ready.  Place together in one bowl, ready to ready to mix in at the end.

1 cup crushed pineapple, drained, (reserve 1/4 cup of the juice for step 4)
3/4 cup dried cranberries (or raisins)
2 cups grated carrots
1/2 cup chopped walnuts

Step 3:  Dry ingredients.

Mix the following dry ingredients together into a large mixing bowl.  Mix together with a spoon until smooth and blended.

1 cup brown rice flour
1 cup white rice flour
1 t xanthan gum
1 t baking soda
2 1/2 t baking powder
1 1/2 t cinnamon
1/4 t cloves
1/4 t nutmeg
1/2 cup white sugar
3/4 cup brown sugar
1 t sea salt

Step 4:  Wet ingredients.

Pour these wet ingredients into the large mixing bowl of dry ingredients in step 3.  Use a hand beater or stand mixer to mix these for a minute or so.

9 TBSP of Aquafaba OR Ener-G Egg Replacer for 3 eggs *
3/4 cup oil
1/4 cup pineapple juice (reserved in step 2)


Step 5: Final mix.

Add the chunky ingredients from step two into the large mixing bowl and mix them with the beater, until all mixed together.

Divide into the cake pans.  Set into the oven.  Bake for 50 minutes, or until a toothpick comes comes out clean.  Cool for at least 20 minutes in the pans, then remove.  Cool completely before eating.

*Note:  Aquafaba is the liquid in a can of cooked garbonzo beans.  You can use it straight from a can, or you can use the liquid for homecooked garbonzo beans.  3 TBSP Aquafaba = 1 egg.  


Monday, November 26, 2012

Pumpkin Muffin Recipe - Gluten-free, Vegan and Updated


 For quite a while now I have needed photos of my very successful and popular Pumpkin Muffin Recipe - gluten-free, vegan and delicious.  This morning I made another batch, which turned out splendidly, I might add, and I grabbed my camera as soon as they were out of the oven.  They need to cool just a little bit you know before you take a bit out one.  I don't want anyone to burn their mouth. 


So hurry over to my Pumpkin Muffin recipe, gather the ingredients and make yourself a nice batch of yummy, moist muffins.  For those of you who have been there before, go ahead and take a look too, because I have tweaked the recipe, sharing a few improvements I've made. 

Sunday, November 25, 2012

Thanksgiving Dinner 2012


Thanksgiving dinner was fabulous.  We enjoyed the vegan, gluten-free dinner with my parents, and two other families, all of which brought food to contribute.  I had enough plates by alternating two sets of china.  There were just enough pieces of stem ware for everyone to enjoy some sweet apple cider brought by one of the guests.  She also brought a yummy apple crisp, topped with pecans, and a bowl of peas.  I'll have to see if she can share the recipe for the crisp.


Another family brought mashed potatoes, gluten-free vegan gravy with mushrooms, and homemade cranberry sauce.  To make the cranberry sauce she simply boiled one cup of fresh cranberries with 1 cup of pineapple juice with 1/4 cup of brown sugar for 15 minutes until the cranberries popped and became soft and thick.


I made some home made gluten-free, vegan stuffing with a loaf of frozen millet bread.  I sautéed some onions, garlic and celery and mushrooms.  I added sliced olives and some chopped walnuts.  I made up some chicken like broth with LaChicky seasoning and dried Italian herbs, (but I think I might like Bill's Best brand better).  Pour the broth over the cubbed millet bread, and stir, taste to make sure you like the flavors.  Place mixture in a casserole dish and let it set for a while to soak it all in, and then bake at 350 degrees until there is a nice crust on top.

I made some bake tofu slices as my kids requested.  I got some very, very firm tofu and sliced it into triangles the night before.  House Foods, organic 2 pound bricks is a brand I really like for this.  Softer tofu can work, but it is more likely to crumble.  I made a marinade sauce out of Bragg's liquid aminos, and lemon juice.  I spread the tofu triangles out in a pan, and poured the marinade over it and let it set overnight in the refrigerator.  First thing in the morning I turned all the pieces over so they could sit a while on the other side.  Later I made a breading meal out mostly nutritional yeast, with some rice flour and tapioca flour, onion powder, garlic powder and salt.  Then I dipped each triangle into the breading meal and put them on a sprayed cookie sheet.  The oven was pre-heating to 425 degrees.  I baked them about 25 minutes on each side.  They turned out great, a nice little cutlet for a turkey free table, and not fried either.

The entree was the Chickpea, Veggie Walnut Loaf, I posted earlier in the week.  I think I would make it again, but I think I might tweak the seasonings a little bit.  I definitely think it needed more dried cranberries, or a good dollop of cranberry sauce on top, but then I love cranberries.

The pies were the greatest success in my mind.  I loved how the pumpkin pies turned out, especially the crust.  But I am feeling a little guilty, because the crust was not low fat, but rather full fat.  But at least they weren't bricks or crumbles this year.  Gluten free crusts are so hard to manage, unless you add a good measure of fat.  So I can decide if I should tell you what the crust recipe was or not.  I don't want to lead anyone astray, but is going to be the recipe I made next time.  I love pies.  They have been one of my favorite desserts since I was a little girl, but I haven't made them very often for the last 5 years or so, because of the crust and fat problem.  If any of you wise gluten-free, vegan eaters can help me out, I would be very grateful. 

We are now taking a break before the next festive meals are upon us.

Friday, November 23, 2012

My New Favorite Vegan Pumpkin Pie Filling

Pumpkin Pie and Raisin Pie, ready for Thanksgiving dinner.
Thanksgiving dinner turned out to be a great success.  The table was surrounded by gluten-free, vegans, my soy, flax, and lentil -free friend, my peanut and almond -free daughter.  It was a challenge to make food everyone could eat, but we were successful.  But with that combination of people I couldn't make my regular pumpkin pie recipe, because it contains soy and flax.  I searched and thought until I came up with what I thought to be the perfect recipe.  And it is now my new favorite.  I hope you enjoy it too.


My New Favorite Vegan Pumpkin Pie Filling
awildflowermorning.blogspot.com
  • 2 1/4 cup canned pumpkin
  • 1/2 cup natural cane sugar, such as Florida Crystals
  • 1/4 cup full-fat coconut cream
  • 1/4 cup pure maple syrup
  • 3 tbsp arrowroot powder (or cornstarch)
  • 2 tsp vanilla extract
  • 2 tsp cinnamon
  • 1/4 tsp ground ginger
  • 1/4 tsp nutmeg
  • pinch of ground cloves
Mix together all the ingredients until smooth.  Pour into a pre-baked pie crust.  Bake 45 minutes at 350 degrees.

Note:  The dark colored pie in the photo is a raisin pie, made with a recipe from My Cozy Kitchen blog.  It was delicious, and we will make it again too.  I found it very easy to make, once you have a pie crust.  Gluten-free pie crust is another story, that I'll write about in another post sometime.

Wednesday, November 21, 2012

Chickpea Veggie Walnut Loaf - Gluten-free, Vegan

Chickpea Veggie Walnut Loaf
awildflowermorning.blogspot.com

Gluten-free, Soy-free, Corn-free, Vegan

Saute, (then move to a large mixing bowl):
1 cup diced celery (about 2 stalks)
1 large onion diced
5 medium-large garlic cloves, pressed

Process in a food processor, (then move to a large mixing bowl):
3 cups of chickpeas, drained  (reserve an additional 3/4 cup chickpeas for later)
2 T lemon juice
1 T La Chicky seasoning, or other gluten-free, vegan chicken style seasoning, or tamari or Bragg's Liquid amionos
1 1/2 tsp italian herbs
2 tsp sea salt
1 Tbsp onion powder
1 tsp dried basil
When finished with this group, rinse and dry the food processor bowl for the next step

Toast, (then move to a large mixing bowl)
1 cup of walnuts in a dry frying pan on medium-low heat, then place into the cleaned out food processor bowl and pulse to make crumbs with
3/4 cup of gluten free rolled oats (reserve an additional 1/2 cup of gluten-free rolled oats for later)

Add and Mix the remaining ingredients into the large mixing bowl with all the above.
3 cups shredded potatoes
1 cup shredded carrots
1 - 10oz. package of frozen chopped spinach, thawed
3/4 cup dried cranberries
3/4 cooked garbonzo beans (the ones you reserved up above)
1/2 cup gluten-free rolled oats (not processed)
1/4 cup tapioca starch

You may adjust the salt as needed according to if you used canned garbonzo beans or if you used the saltier canned beans.  I used home cooked garbonzos, and thus needed more salt.  Also, the potatoes will absorb salt during the cooking time.

Place in a 9 by 13 casserole dish, or divide between two loaf pans.   Lightly spray or oil the dishes.  Spoon in the mixture and smooth. 

Bake at 375 degrees for 1 hour.

Serve with cranberry sauce.


Cashew Gravy

Cashew Gravy

1 cup of raw cashews
1/2 cup brown rice flour
1.5 tsp onion powder
0.5 tsp garlic powder
1 tsp salt
2 tsp LaChicky seasoning or other chicken like seasoning (optional)
1/3 cup nutritional yeast
4 cups of water

Blend until very smooth.  Pour into a sauce pan, and heat until it thickens.  You may need to add more water at the end.  As it gets closer to a boil stir continually so it won't stick and burn.  (It is a very real danger.)

Roasted Root Vegetables

ROASTED ROOT VEGETABLES

Peel and dice any of the following root vegetables:
sweet potatoes/yams
red skin or Yukon Gold potatoes
beets, golden (red’s bleed)
butternut squash
rutebega
parsnips
carrots
whole crushed garlic

Toss them all into a large pan and drizzle with olive oil, kosher salt and freshly
ground pepper. Add some sprigs of rosemary too, if you like. Roast, stirring once
or twice, at 375 for at least 45 minutes. (If you’re using rutebega, start roasting that
first, as it needs extra time to soften.) Very little olive oil is necessary. 1 T at the
most for a 9 x 13 pan.

Thanksgiving Menu

I thought I'd share with you what I'm making for Thanksgiving dinner tomorrow.  I'll add photos when I have them.  For now, I'll just put the list up, in hope that it might help you make a decision.  I am trying some new recipes, so I'm not sure how everything will turn out, so I'll come back with a report on that too.

Menu

Chickpeas and Veggie Walnut Loaf
Baked tofu
Mashed potatoes and Cashew Gravy
Roasted Root Vegetables
Homemade Stuffing with Millet Bread
Cranberry Sauce
Veggie Platter
Apple Cider
Pumpkin Pie
Apple Crisp


Tuesday, September 25, 2012

Chilli Lemon Tofu, Collard Greens and Brown Rice

-->
 1.  Get the brown rice cooking.

2.  Make the marinade.  Get it mixed up and soaking on the tofu.  Soak for 20 minutes or so.

3.  Cut up the collards, by cutting off the rib.  Then stacking the leaf part of 2 - 3 collards at a time, rolling them up like a sleeping bag, and then start slicing thin rounds off the end.  Cut up the onions too.

4.  Place the tofu and marinade in a skillet, and start cooking on medium temperature.  Stir very gently, but often enough to keep no part of the pan drying out before another part of the pan.  Cook until there is no moisture left and it is just starting to stick.  Turn off the heat and remove the pan from the burner.  Set aside.

5.  While the tofu is cooking, get the collards into a large kettle.  They will cook down quite a bit.  You need 4 - 5 times as much volume of fresh greens as you will need cooked greens in the end.  Add the onion, lime juice and salt.  Cover with a lid, and cook until the greens are cooked down in size and the onions are transparent.

6.  Spoon out a layer of cooked brown rice onto a platter.  Spread the collard greens around on top of the rice.  Lay out the tofu as the top layer.

Serve.

My recipe: Lemon Chili Marinade 
1/3 cup Bragg's liquid aminos or Tamari
Juice of one lemon
2 tsp SiRacha sauce
1/4 cup nutritional yeast
black pepper, optional


Greens
Kettle full of collard greens, ribs removed, rolled and cut thinly
One onion diced
Juice of one lime
1/2 tsp salt
water to cover the bottom of you kettle 1/2 centemeter deep